Monday, March 30, 2009

Apricot Chicken


This recipe reminds me so much of my childhood! On special holidays my grandmother used to make a version of Apricot Chicken. Since moving away when I first left for college, it became harder and harder to get home for these dinners. It always makes me a little sad as different holidays come and go, to know that I am missing out from the family gathering and traditions. I guess, in the meantime, I will have to find my copycat dishes and wait for my next trip back home.
This recipe was delicious, incredibly easy to throw together, and very close to my grandmother's. I must warn, though, to watch it carefully as you obviously don't want your chicken to dry out. The sauce is nice and sweet, and not too overwhelmingly 'apricot'. I would recommend serving it with a little sauce spooned over each piece of chicken. My grandmother always used a cut up fryer, but I made mine this time using all boneless, skinless chicken breasts. I think either way would work, depending on your preference.
Apricot Chicken
6 skinless, boneless chicken breast halves
1 1/2 (1 ounce) packages dry onion soup mix
1 (10 fluid ounce) bottle Russian-style salad dressing
1 cup apricot preserves
Preheat oven to 350 degrees. Place the chicken pieces in a 4 quart casserole dish. Mix the soup mix, dressing and jam together, and pour over the chicken. Cover dish and bake for 1 hour in preheated oven.
Source: Allrecipes.com

Saturday, March 28, 2009

Cupcakes, Cupcakes Everywhere!


As Christy and I continue to grow our bakery business, we are always looking for new methods and techniques that we can add to our repertoire. We've been able to work quite a bit on our sugar cookies as we have been very busy with Spring Bouquet orders, developing Easter cookies and our now finalized Mothers' Day Bouquet. It is so much fun to be able to work together towards a common goal while doing what we truly enjoy! Christy's kids are on Spring Break this week, so we decided to look for a project that they would be able to enjoy with us as well. These cupcakes looked like a perfect place to start. Neither Christy nor I have had any experience playing with fondant and it has been high on our "must try" list for quite some time. I don't want to speak for Christy, but I can say that working with fondant might be my new favorite thing! :) From kneading it out, to flavoring, coloring, rolling, cutting, smoothing, etc. I had so much fun along the way and was almost sad to see the last cupcake finished! The best thing about it was that it was a method that we were able to include Christy's girls with-- and they were right alongside us, helping all the way. Christy's blog has some great 'action' shots of her girls at work! We had so much fun and couldn't believe our eyes when we looked at the clock and saw how much time had passed! We were so busy working (and laughing) that the day was over before we knew it. I just can't wait until my little girl is old enough to play as well! If you asked me, though, she seemed to enjoy the process all the same!

Sources: JoAnn Fabrics and numerous cake decorating books


Thursday, March 26, 2009

Braised Beef with Mushrooms and Cabernet Sauce

I have to say that for some reason, this is one cooking method that I have always been a bit intimidated by. Now that I have tried it, however, I feel a bit foolish for having waited so long! I've been looking for excuses to play with my new dutch oven (which I LOVE, by the way!) and when I looked at Brown Eyed Bakers photos from this recipe, I knew I would have to get this particular dish on our menu. The meat was so unbelievably tender it literally melted in our mouths! One change that I did make was to chop up the celery as well. Chelle (Brown Eyed Baker) stated that although the recipe didn't say to, she decided to serve the carrots on the side of her meat and mushrooms. The recipe calls for 2 stalks of celery, but I decided to chop those up as well to give the dish more of a stew consistency, serving the carrots as well. Overall, it made a pretty inexpensive meal and was a great comfort food. If you haven't tried braising meat before, this is a great dish to start with! Now that I am a fan, I'd love to hear about any other recipes anyone might have!

Braised Beef with Mushrooms and Cabernet Sauce

3 lbs. beef chuck roast, trimmed and cut into 2-inch cubes
2 large onions, peeled and quartered
3 large carrots, cut into chunks
2 stalks celery, trimmed and halved
6 garlic cloves
8 oz. white mushrooms, quartered
2 fresh rosemary sprigs
2 fresh thyme sprigs
3 fresh parsley sprigs
½ teaspoon kosher salt
1 teaspoon whole peppercorns
3 bay leaves
1 cup Cabernet savignon
2 cups chicken stock
2 Tablespoons all-purpose flour
2 Tablespoons olive oil

Preheat oven to 275°. Dry beef thoroughly and season generously with salt and pepper. Heat 1 Tablespoon of olive oil in a dutch oven over medium-high heat. Add half of the meat so that the pieces are not touching and cook without moving them until browned, about 2-3 minutes. Use tongs and rotate pieces until all sides are browned (about another 2 minutes). Transfer the beef to a medium bowl, add another 1 Tablespoon of olive oil to the pot and repeat the previous steps with the other half of meat. Add the wine and de-glaze the pan, scraping up all the browned bits from the bottom. Add all of the beef back to the pot and stir in the chicken stock, filling only until meat is just covered by liquid. Stir in flour, dissolving completely. Add onions, carrots, celery, garlic, bay leaves, salt and pepper. Pile on mushrooms, add herb sprigs, and return to a boil. Cover and place in preheated oven and cook for 2 hours.

Remove from oven and drain all contents, reserving the liquid. Return the liquid to the pot and boil on medium high heat until thickened, about 12 minutes. Meanwhile, remove beef and mushrooms from drained contents and place on serving platter. Once mixture has thickened, spoon about 1/3 cup of sauce over meat and serve remaining in a gravy dish on the side.

**I served mine over mashed potatoes.

Source: Brown Eyed Baker (originally from Good Things Catered)

Monday, March 23, 2009

Tuna Noodle Casserole


I was really excited to find this tuna noodle casserole because it had a lot of ingredients that I wouldn't have normally thought to add to the dish. I love this casserole as an old standby comfort food, but this particular recipe is a little more of a 'grown up' version. I liked that it also allowed me to add some extra vegetables in, too. I knew that I needed to make it a little heartier for a meal, so I wanted to add an additional can of tuna to my version. I also added extra pasta as I wanted to use a dish that was a little longer. I didn't want my casserole to be too thin. The only problem with this is that I really think I should have doubled the leek soup/milk as well. I added 2 cups of milk instead of the 1.5 it called for, but next time I will definitely add the full double of soup mix and milk. The flavor was really good and the texture was great!
Tuna Noodle Casserole
8 ounces uncooked linguine
1 cup frozen broccoli florets
1 package (1.8 oz) leek soup mix
1 1/2 cups milk
Dash pepper
1 can (5 oz) albacore tuna, drained
2 tablespoons chopped drained roasted red bell peppers
1 tablespoon butter or margarine, melted
1/4 cup plain bread crumbs

Heat oven to 350°F. Spray 8-inch square (2-quart) glass baking dish with cooking spray. Cook and drain linguine as directed on package, adding broccoli for last 2 minutes of cook time.
Meanwhile, in 1-quart saucepan, mix soup mix and milk. Heat to boiling over medium heat, stirring constantly. Stir in pepper. Add linguine, broccoli, tuna and roasted peppers to soup mixture; stir gently to mix well. Spoon into baking dish. In small bowl, mix butter and bread crumbs; sprinkle over linguine mixture. Bake uncovered 20 to 25 minutes or until top is golden brown.

Sunday, March 22, 2009

Spicy Shredded Pork and Awards!


I've gotten to the point where I know I can try anything that the Pioneer Woman posts on her blog without the slightest worry about whether or not it will be loved! This shredded pork recipe is no exception, and it had my husband and little boy coming back for more! It was actually quite humorous to see my 2 year old holding a pork taco that was bigger than his own head! :) He loved it though!
The original recipe calls for the pork to be roasted for about 6-7 hours in the oven. Since my littlest one has been sick, I wasn't sure that I would have the flexibility to move it around every hour or so, to keep it moist and evenly cooked. With this in mind, I went ahead and prepared it the same way, but then put it in my crock pot instead. I can't vouch for how this compares to the roasting method and I do hope to try it that way one day. I can say that in the crock pot, the flavor was amazing and it literally fell apart. So delicious and my house smelled wonderful! I'm including my crock pot instructions here, but feel free to follow the source back to the Pioneer Woman for her original directions.


Spicy Shredded Pork
4-7 pound pork shoulder
1 onion
1 teaspoon chili powder
1/4 cup brown sugar
3-4 garlic cloves
1 teaspoon dried oregano
1 teaspoon ground cumin
1-2 tablespoons salt
pepper
1-2 tablespoons olive oil
2-3 tablespoons white wine vinegar

Rinse and pat dry the pork shoulder. Place the pork shoulder in the bottom of a 6 quart crock pot and add about a cup of water in the bottom. Combine oregano, cumin, salt, pepper, garlic, brown sugar, chili powder, garlic, olive oil, white wine vinegar and quartered onion in the food processor. Process until well blended. Pour over the pork and rub well into entire surface. Cook on low for 6-8 hours or until the meat easily shreds using 2 forks. Serve in warm tortilla shells with fresh salsa and sour cream.

Source: Adapted from The Pioneer Woman


Now... onto the awards! I was so excited to hear from Heidi, from Tried and True Cooking with Heidi , that she was passing on several awards to my blog! These are my first official awards, so my sincere thanks to Heidi! I'm so touched and honored!

The 'Friends' award comes with the following message: "These blogs are exceedingly charming. These kind bloggers aim to find and be friends. They are not interested in self-aggrandizement. Our hope is that when the ribbons of these prizes are cut, even more friendships are propagated."It also says : "Please give more attention to these writers. Deliver this award to eight bloggers who must choose eight more and include this cleverly-written text into the body of their award."

In the spirit of these awards, I am passing all three along to some of the blogs that I find myself checking on a regular basis.

Christy's Kitchen Creations
Rachel vs. The Kitchen
The Life and Loves of Grumpy's Honeybunch
Tried and True Cooking with Heidi
My Tasty Treasures
The Sisters Cafe
Brown Eyed Baker
Annie's Eats
Picky Palate

Sunday, March 15, 2009

Italian Wedding Soup

When I purchased Ina Garten's book, The Barefoot Contessa Back to Basics, this recipe was on the top of my list to try. I am definitely a huge soup fan, especially during the cold winter months. Now that we have some hope for warmer, spring weather, I have been trying to get some of my soups in before the weather does change. When shopping for ingredients, I had a hard time finding the chicken sausage and ground chicken that the recipe calls for. I did find some turkey Italian sausage and decided to give it a try instead. The amount in one package was exactly what the recipe called for, so I used only this instead of combining with regular ground turkey. I have never tried Ina's version, but I have to say that I was not at all disappointed with the way my meatballs turned out. They were delicious, if I do say so myself! The soup came together easily and was definitely one that I would make again. It reheated well through the week and I even had enough to send a container home to my mother.

Italian Wedding Soup

For the meatballs:
3/4 pound ground chicken
1/2 pound chicken sausage, casings removed
2/3 cup fresh white bread crumbs
2 teaspoons minced garlic (2 cloves)
3 tablespoons chopped fresh parsley leaves
1/4 cup freshly grated Romano
1/4 cup freshly grated Parmesan, plus extra for serving
3 tablespoons milk
1 extra-large egg, lightly beaten
Kosher salt and freshly ground black pepper

For the soup:
2 tablespoons olive oil
1 cup minced yellow onion
1 cup diced carrots (3 carrots), cut into 1/4 inch pieces
3/4 cup diced celery (2 stalks), cut into 1/4 inch pieces
10 cups homemade chicken stock
1/2 cup dry white wine
1 cup small pasta such as tubetini or stars
1/4 cup minced fresh dill
12 ounces baby spinach, washed and trimmed (I didn't use quite as much)

Preheat the oven to 350 degrees. For the meatballs, place the ground chicken, sausage, bread crumbs, garlic, parsley, Romano, Parmesan, milk, egg, 1 teaspoon salt, and 1/2 teaspoon pepper in a bowl and combine gently with a fork. With a teaspoon, drop 1 to 1 1/4-inch meatballs onto a sheet pan lined with parchment paper. (You should have about 40 meatballs. They don't have to be perfectly round.) Bake for 30 minutes, until cooked through and lightly browned. Set aside.

In the meantime, for the soup, heat the olive oil over medium-low heat in a large heavy-bottomed soup pot. Add the onion, carrots, and celery and saute until softened, 5 to 6 minutes, stirring occasionally. Add the chicken stock and wine and bring to a boil. Add the pasta to the simmering broth and cook for 6 to 8 minutes, until the pasta is tender. Add the fresh dill and then the meatballs to the soup and simmer for 1 minute. Taste for salt and pepper. Stir in the fresh spinach and cook for 1 minute, until the spinach is just wilted. Ladle into soup bowls and sprinkle each serving with extra grated Parmesan.

Source: Barefoot Contessa, Back to Basics

Chocolate Chip Waffles

Since so much of our week is filled with rushed mornings, our tradition is to take advantage of lazy Sunday mornings to create nice family breakfasts shared around the kitchen table. My son has been a bit obsessed with chocolate chip pancakes for a while now (completely my fault for introducing them in the first place!) and I decided to mix it up a bit and attempt to switch him to waffles for a change. I used my belgium waffle maker for these and he actually ate a good half of one of them-- a stellar amount for my little man! They were actually a hit with the grown man in my life as well! :) The batter was nice and light and had a really nice consistency when cooked. They were rich with the mini-chocolate chips included, so they actually went further than I had expected. One batch made 6 large belgium waffles.

Chocolate Chip Waffles

1 3/4 cups all-purpose flour
1 3/4 teaspoons baking powder
1/8 teaspoon salt
2 large eggs, at room temperature
1 large egg white, at room temperature
1 1/2 cups milk, at room temperature
1/2 teaspoon vanilla extract
1/4 cup unsalted butter, melted, plus more for brushing the iron
1/4 cup sugar
1 cup mini-chocolate chips

Whisk the flour, baking powder, and salt together in a medium bowl. Separate the 2 eggs and put all of the egg whites (3 total) in a large bowl. In a large liquid measuring cup or bowl, whisk together the egg yolks, milk, vanilla and 1/4 cup melted butter. Whisk the milk mixture into the flour mixture until a batter is formed. Take care not to over-mix the batter. Whip the egg whites with an electric mixer until they just begin to hold a loose peak. Scatter the sugar over the whites and continue beating until they hold a soft peak. Fold a third of the egg whites into the batter to lighten the base, then fold in the remaining whites. Gently fold in the chocolate chips.

Preheat a waffle iron to medium high. Brush the inside surface of the waffle iron with melted butter. Pour in enough batter to barely fill each hole of the waffle iron (keeping in mind that the batter will spread once the lid is closed). Close the iron and cook until crisp and the waffle iron stops steaming, about 5 minutes. Serve as the waffles come off the iron or transfer to a dish in the oven heated to 200 degrees F. Repeat with the remaining batter.

Source: Annie's Eats, originally from the Food Network Kitchens

Tuesday, March 10, 2009

Cinnamon Swirl Quick Bread


Ever since seeing the Cinnamon Coffee Cake on Christy's Kitchen Creations, I have been craving it with a nice hot cup of coffee first thing in the morning. Since my kiddos have been sick, I haven't had much time to spend in the kitchen doing a lot of baking. When I saw this quick bread, I knew I had found a great, fast alternative! I especially loved that the ingredients were all pantry staples, so it could be made without much prior planning. The recipe only took about 15 minutes to put together, so I was able to mix it up one night while waiting for our dinner to finish cooking. I baked it the night before and then waited to add the glaze until right before serving.

Before you bake the bread, you use a knife to swirl the cinnamon/sugar mixture into the batter. When I added the glaze the next day, it followed the knife lines into the bread to give a bit of extra sweetness throughout each slice. It presented well and was enjoyed by my entire family. The bread was moist and stayed that way as we ate on it through the week.

Cinnamon Swirl Quick Bread

2 cups all-purpose flour
1.5 cups sugar, divided
1 teaspoon baking soda
1/2 teaspoon salt
1 cup buttermilk
1 egg
1/4 cup vegetable oil
1 tablespoon ground cinnamon

Glaze:
1/4 cup confectioners sugar
1.5 - 2 teaspoons milk

In a large bowl, combine the flour, 1 cup sugar, baking soda, and salt. Combine the buttermilk, egg and oil; stir into dry ingredients just until moistened. In a small bowl, combine the cinnamon and remaining sugar. Grease the bottom only of a loaf pan. Pour half of the batter into the pan; sprinkle with half of the cinnamon/sugar mixture. Carefully spread the remaining batter and sprinkle with the remaining cinnamon/sugar. Swirl a knife through the batter. Bake at 350 degrees for 45-50 minutes or until a toothpick inserted near the center comes out clean. Cool for 10 minutes before removing from the pan to a wire rack to cool completely.

For the glaze, combine the confectioners sugar and enough milk to achieve drizzling consistency. Drizzle over bread.

Source: The Taste of Home Baking Book

Sunday, March 8, 2009

Italian Beef


This recipe is one that my extended family makes often for birthday parties and large family gatherings, but I'm not sure why I don't think to often include it in our normal rotation. It does make a large crock-pot full of meat, but also reheats easily and is especially convenient during busy weeks. My two little ones are both sick at the moment, so I chose this week to make it as it would make for easy leftovers when my babies could use more of my time. I tend to like my sandwiches a little more on the mild side, so I use the mild pepperocinis in the recipe and give my husband (who prefers the extra spice) a pile of them on the side which he can add to his sandwich. I find this is the easiest way to make sure that everyone is satisfied and can enjoy their meal at their own taste.
Italian Beef
Chuck roast (I use the biggest one I can find at the store-- like I said, it reheats really well!)
1 jar mild pepperocini slices
1 envelope onion soup mix
1 green pepper, sliced
1 large can mushroom pieces
1/2 chopped onion
chopped garlic to taste
Put all ingredients in the crock pot on low. (Do not drain the mushroom pieces or the pepperocinis. You want this liquid to cook the beef in.) After 8 hours, shred the meat with two forks. Continue cooking. Serve in sturdy rolls.
Source: Adele Fine

Friday, March 6, 2009

BLT and Cheese Panini


The BLT is one of my favorite sandwiches, so I couldn't wait to try making one on our new panini maker. Ideally, I would use a good french bread to make this version, but my store-bought bread didn't quite survive the week the way I had hoped it would! In place of it, I used a basic sandwich bread. It was still good, but the french bread would have been better. The only other bit of advice would be to carefully monitor how long the sandwich cooks for. You obviously want the cheese to melt, but do not cook it much past that or your lettuce will get quite soggy.

BLT and Cheese Panini

2 pieces of french bread per sandwich, cut at a diagonal
cooked bacon
sliced tomato
lettuce
mayonnaise
mustard
provolone cheese
olive oil

Mix mayonnaise and mustard to taste and spread on one side of each slice of bread. Drizzle olive oil over the entire back side of each piece. Place oil side down. Assemble sandwich by placing one piece of cheese, bacon, tomato, and lettuce (in that order) on each sandwich half. Carefully place sandwich together and put onto the center of the panini grill. Press down on the top of the grill for about 10-15 seconds, then grill only until cheese is melted. Remove from the grill and cut diagonally.

Sunday, March 1, 2009

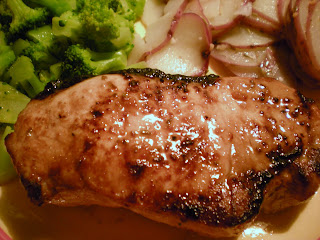
Balsamic-Glazed Pork Chops with Rosemary Garlic Potatoes


If you are ever in need of a 30 minute meal that tastes like day-long, traditional home cooking, this is certainly a great choice! I first found this recipe for Balsamic-Rosemary Vinaigrette in the newest issue of Everyday Food magazine and knew it was one that would be great on a crisp salad. As I continued to browse, I found the pork chops marinated in the vinaigrette and the perfect pairing of rosemary potatoes. I was a bit weary of the potato recipe as it is cooked in the microwave, but I was very pleasantly surprised by the finished product. The entire meal was easy to prep and cooked within 20 minutes. It is definitely one I will hold onto as a quick, weekday meal.


Balsamic-Glazed Pork Chops

4 bone-in pork rib chops (I used a simple thick cut chop)
course salt and ground pepper
1/2 cup Balsamic-Rosemary Vinaigrette (recipe to follow)

Place pork in a shallow dish and season with salt and pepper. Pour vinaigrette over pork, and turn to coat. Cover, and refrigerate at least 1 hour (or up to a day). Heat broiler, with rack set 4 inches from heat. Remove pork from marinate (letting excess drip off); place on a foil-lined, rimmed baking sheet. Broil, without turning, until opaque throughout, 8-10 minutes. (If chops are browning too quickly, turn them.) Let rest 5 minutes before serving.


**I had to turn mine to keep the browning even and too cook evenly.


Balsamic-Rosemary Vinaigrette


1/3 cup balsamic vinegar
1 tablespoon Dijon mustard
1 small garlic clove
1 tablespoon fresh rosemary (or 1/4 teaspoon dried)
2 tablespoons water
1/2 teaspoon coarse salt
1/4 teaspoon ground pepper
1/2 cup extra-virgin olive oil


Combine first 7 ingredients in a blender, blending until smooth. With machine running, add olive oil in a thin stream, blend until creamy. (To store, refrigerate up to 2 weeks.) Makes 3/4 cup.


Rosemary Garlic Potatoes

1 tablespoon olive oil
2 garlic cloves, sliced
2 sprigs fresh rosemary (or 1/4 teaspoon dried)
1.5 pounds red new potatoes, scrubbed and thinly sliced
coarse salt and ground pepper

Combine oil, garlic, and rosemary in a 2 quart microwave safe baking dish with a lid. Cover, and microwave on high until garlic is fragrant, about 1 minute. Stir in potatoes. Cover and microwave on high until potatoes are tender, 13-15 minutes. Season with salt and pepper.


Source: Everyday Food Magazine (March 2009)